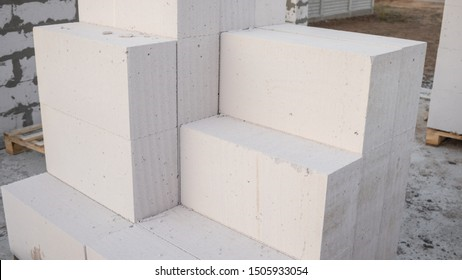
AAC stands for Autoclaved Aerated Concrete is a light weight concrete material used for manufacturing of building blocks.
Let’s know more about ACC block :
AAC Blocks are called Autoclaved Aerated Concrete.
Autoclaved implies that these blocks are burnt in a furnace.
Aerated implies that there are voids present in the AAC blocks and are completely made of Concrete.
SIZES:
As per IS-2185 Part-III, clause3.2
AAC blocks come in lengths of 400mm, 500mm or 600mm.
AAC blocks come in height exactly half of the length i.e., of 200mm, 250mm or 300mm.
AAC blocks come in width of 100mm,150mm,200mm or 250mm
During the Islamic period, all methods of tile decoration were brought to perfection in Persia.
ADVANTAGES
1. Porous in nature
2. Require less quantity of mortar because the surfaces are smooth and levelled.
3. Curing required is also very less. It requires only sprinkles of water.
4. It can be cut easily with the help of a drill or an ordinary saw.
5. One of the biggest features of AAC blocks is its lightweight.
6. Easy to handle and requires less labour.
DISADVANTAGES
1. It is a non-load bearing material. The bearing capacity of AAC blocks is very low. As per IS2185 its bearing capacity is 4 N/mm2, which is very low.
2. It is slightly brittle in nature.
THINGS TO BE DONE BEFORE PROCUREMENT:
MTC is Manufacturing Test Certificate, it needs to be procured from the vendor to ensure the quality of the AAC blocks.
After the preparation of AAC blocks it should be subjected to a curing period of 28 days.
After curing it should be allowed to dry for 15 days to make sure there is no dry shrinkage as it may lead to shrinkage or expansion.
USAGE:
We should provide runners to support the AAC blocks.
If the floor height is 3m and the depth of beam is 0.2m, i.e., the casting of AAC blocks needs to be done for a height of 2.8m and assuming no runners are provided. At a height of 1.2m we can provide a RCC runner, i.e., a RCC beam to support the AAC block casting in order to prevent development of cracks in the AAC blocks.
We can also provide columns called stub columns, for a span more than 6m.
For more details, watch this:
About us: Civil Center is a Civil Engineering Consultancy company which provides services ranging from Building Consultancy Services like Architectural Plan, Structural Drawing, Estimation, 3D Views of Interior and Exterior of a Building, Construction Planning and Management, and also other services like Survey Investigation Works.

We also provide Industrial Training to Civil Engineering Students as well as professionals which include courses on Building Design, Detailing Estimation, 3D Modelling and Survey by using Software like STAAD. Pro, Tekla Structural Designer, Revit Structures, Tekla Structures, MS Excel, E-Survey. In training our goal is to make our trainees ready for the industry by getting them trained in Live Projects. We also provide placement assistance to our trainees.
To join our live classes on Tekla Structural Designer and other courses related to Civil Engineering, click here : https://forms.gle/Yy9j8BH8zZzmFfZMA
For any query
Call on: 8433248864
WhatsApp: +91 6372905201
Email: team@civilcenter.in
If you have any requirement of Building Consultancy Services like Architectural Plan, Structural Drawings etc., register using the link given below
https://forms.gle/M4MTqgcLP6ZEp4rs7
Whatsapp: +91 6372905201
Email: enquiry@civilcenter.in
Visit our Website: http://www.civilcenter.in/
Visit our Website: http://www.civilcenter.in/
You Can Find Us On Other Social Media
Follow us on Telegram :https://t.me/civilcenter17
Visit our Facebook Page: https://www.facebook.com/civilcenter/
Visit our LinkedIn Page: https://www.linkedin.com/company/civil-center
Follow our Twitter Handle: https://twitter.com/_CivilCenter
Follow us on Instagram: https://www.instagram.com/civilcenter17/
Comments
Post a Comment