Marble is a metamorphic rock, which is a rock that has been physically and chemically transformed over time due to intense heat and pressure. Marble begins life as limestone, which is a soft stone made primarily of calcite. Under heat and pressure caused by magma or the tectonic plates, this limestone begins to recrystallize, changing the texture of the rock and causing the calcite crystals to grow and interlock. Marble can be found in many areas around the world, from Macedonia to Vermont, but the most famous varieties come from Italy and Greece, where it is often purest in color.
Comparison Between Italian Marble & Indian Marble
Raw materials which are used in making of the tiles are:-
Marble has a timelessly elegant charm, be it used for the living rooms, kitchen countertops, or bathrooms. It has always been among the most popular natural stones for home decor, and Italian and Indian marble are the most widely used varieties. In North India, Indian marble is extensively mined, making it a cost-effective option available in a wide range of colours and textures. It has a medium luster and is a stone that is comparatively stronger. The high luster and the potential to impart visual appeal to the place where it is used are highly admired in Italian marble. We bring you the lowdown on Italian marble vs. Indian marble in this article so that you can make an educated choice for your home.
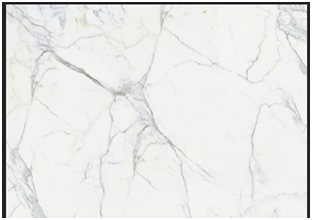
Italian Marble
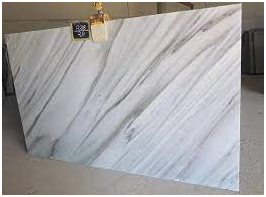
Indian Marble
1. Aesthetics
Indian marbles come in a range of beautiful colours, such as white, pink, green, yellow, grey, and black. Compared to Indian marble, Italian marble doesn’t always come in a range of colours. Black, White, Grey, and Rose are the popular Italian variants. Italian marble, while Indian marble has a medium luster, has very high-quality luster, pearly and luminescent. Most Indian marbles have a more solid look and feel than the delicate, fragile look of Italian marbles. Italian marbles are commonly available in 18-20 mm stone blocks, but different thicknesses of Indian marbles are available and can go up to 30 mm. Italian marbles are available only as slabs that are polished. Indian marbles might however be polished or unpolished. Both forms of Italian marble stones are available in slab form only but marble tiles, slabs, and blocks come in the form of Indian marble. Italian marble is widely preferred and considered the best alternative for outstanding interior design since it is rich in luster or gloss.
2. Durability
The durability of structures such as the Parthenon, the Tower of Pisa, and the Statue of David demonstrates the resilience of Italian marble. These monuments were made from standard Italian marble, and for centuries they have been able to resist corrosion. Italian marbles, however, are now cut into thin slabs to illuminate the atmosphere of luxury. The marble is rendered brittle by these thinner cuts. Consequently, pronominal hair cracks form over a period of time in the marble. So to give it extra protection, a thin nylon net is glued to the back of the slab. Additionally, to prevent the sides from cracking during shipping, hard stones are glued to the edges of the Italian marble. Over time, marbles lose their luster, so they have to be regularly polished to maintain their shine. Due to its robust nature, Indian marble is very durable. Italian marble’s porosity is much smaller, so it absorbs stains very quickly. Indian marble has a significantly higher porosity than Italian marble. Overall, relative to Indian marble, Italian marble maintenance is higher.
3. Applications
Italian marble is tender and vulnerable to scratches. Therefore, on flooring made of Italian stones, heavy objects should never be moved. The stone is mostly used for decorative purposes, considering its delicate character. Some of the stone’s most common uses are in accent walls, tabletops, mantelpieces. Other smaller applications include the use of decorative trays, dispensers of soap, and showpieces. When it comes to Indian marbles, because of their rigid character, the applications are higher. The Indian varieties do not scratch or stain readily. They are therefore widely used as kitchen countertops, walls for the bathroom, accent walls, and tabletops. In bathrooms, living rooms, and kitchens, Indian marble flooring is also suitable.
4. Cost
Italian marble is sold at Rs. 350 to Rs. 5000 per Sq. at a number of price points. Italian marble slabs are very costly, mostly due to import duties compared to Indian stones. Their highly lustrous existence, however, causes Italian stones, despite their inflating price tags, to sell out like hotcakes. Indian marble pricing starts from as low as Rs. 50 per sq. ft and grows to Rs.250 per sq. ft thanks to Rajasthan, Gujarat, Andhra, and Madhya Pradesh quarries. Italian marble comes in a range of texture and colour, but with a small range that includes white Statuario marble, golden Botticino marble, and light grey Carrera marble. For fans of marble, Indian marble has more than hundreds of colours. Ambaji marble, radiant white Makrana marble (Taj Mahal), onyx marble, and Indian green marble all make a major difference to Indian stone. These materials are highly popular for export purposes.
5. Hygiene and Well-Being
Italian marbles are resin-saturated, providing a higher degree of hygiene than other tile products. Due to its water and frost resistant nature, Vitrified Tiles often possess characteristics such as fighting against microorganisms. Indian marble, however, is non-synthetic and chemically free, so the stone is, therefore, better for the wellbeing of our rooms and our physical well-being.
For more details, watch this:
What is Difference Between Indian Marble and Italian Marble || Rate Analysis || Civil Engineering
About us: Civil Center is a Civil Engineering Consultancy company which provides services ranging from Building Consultancy Services like Architectural Plan, Structural Drawing, Estimation, 3D Views of Interior and Exterior of a Building, Construction Planning and Management, and also other services like Survey Investigation Works.

We also provide Industrial Training to Civil Engineering Students as well as professionals which include courses on Building Design, Detailing Estimation, 3D Modelling and Survey by using Software like STAAD. Pro, Tekla Structural Designer, Revit Structures, Tekla Structures, MS Excel, E-Survey. In training our goal is to make our trainees ready for the industry by getting them trained in Live Projects. We also provide placement assistance to our trainees.
To join our live classes on Tekla Structural Designer and other courses related to Civil Engineering, click here : https://forms.gle/Yy9j8BH8zZzmFfZMA
For any query
Call on: 8433248864
WhatsApp: +91 6372905201
Email: team@civilcenter.in
If you have any requirement of Building Consultancy Services like Architectural Plan, Structural Drawings etc., register using the link given below
https://forms.gle/M4MTqgcLP6ZEp4rs7
Whatsapp: +91 6372905201
Email: enquiry@civilcenter.in
Visit our Website: http://www.civilcenter.in/
Visit our Website: http://www.civilcenter.in/
You Can Find Us On Other Social Media
Follow us on Telegram :https://t.me/civilcenter17
Visit our Facebook Page: https://www.facebook.com/civilcenter/
Visit our LinkedIn Page: https://www.linkedin.com/company/civil-center
Follow our Twitter Handle: https://twitter.com/_CivilCenter
Follow us on Instagram: https://www.instagram.com/civilcenter17/
Comments
Post a Comment